2018年のVimファイル検索・文字列検索はfzfとripgrep(rg)で決まり
sublime2 -> atom -> vscode -> sublime3 を経て5年ぶりぐらいにVimに帰ってきたわけですが、当時から色々変わっていて軽い浦島太郎状態です。ともかく大変なのはプロジェクト内のファイル検索と文字列検索。一度、sublimeのようなテキストサーチを経験してしまうとこれなしには開発できなくなってしまいました。
deinをパッケージのインストールに選び、deniteを試すも大きなプロジェクトではその遅さに困り、ctrlPとfzf両方試し、fzfを利用することに決めました。決め手はその速さ。Blazing fastというやつです。
deinを利用しているので、.vimrcにjunegunn/fzfとjunegunn/fzf.vimを追加。
if dein#load_state($HOME . '/.cache/dein')
  call dein#begin($HOME . '/.cache/dein')
  ..
  call dein#add('junegunn/fzf', { 'build': './install --all', 'merged': 0 })
  call dein#add('junegunn/fzf.vim', { 'depends': 'fzf' })
  ..
あとはショートカットを追加。ctrl-Pでファイル検索。ctrl-gで文字列検索です。私はバッファ検索はタブを利用しているのであまり使わないと思っていますが、一応追加。\\でvimコマンド一覧を表示できます。
" FZF
fun! FzfOmniFiles()
  let is_git = system('git status')
  if v:shell_error
    :Files
  else
    :GitFiles
  endif
endfun

nnoremap <C-b> :Buffers<CR>
nnoremap <C-g> :Rg<Space>
nnoremap <leader><leader> :Commands<CR>
nnoremap <C-p> :call FzfOmniFiles()<CR>
私はタブを利用してて、かつ私のtmuxのprefixキーのctl-tが被って利用できなそうだったので、ctrl-oで新しいタブを開くに変更。
let g:fzf_action = {
\ 'ctrl-o': 'tab split'
\ }
文字列検索はripgrep(rg)を採用
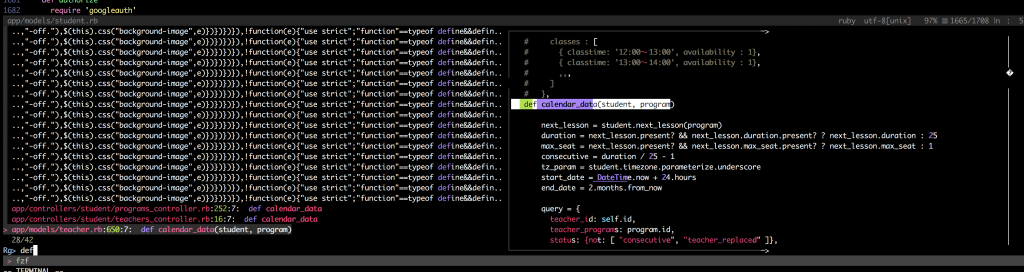
ripgrepをインストールして、Rgコマンドにpreviewを追加。ctrl-gで:Rgが出て、検索する文字列を入れて、Enter。それから?を押すとpreviewモードスタート。ファイルが右側に表示されて便利の極みです。
command! -bang -nargs=* Rg
\ call fzf#vim#grep(
\ 'rg --column --line-number --hidden --ignore-case --no-heading --color=always '.shellescape(<q-args>), 1,
\ <bang>0 ? fzf#vim#with_preview({'options': '--delimiter : --nth 4..'}, 'up:60%')
\ : fzf#vim#with_preview({'options': '--delimiter : --nth 4..'}, 'right:50%:hidden', '?'),
\ <bang>0)
私の整理されてないvimrcはこちら
[Ubuntu] grepからSilver Searcher(ag)。2018年はRipgrep(rg)をインストールする
昔は、find . | xargs grep 2>/dev/nullを使ってました。agに変更後、その速さに驚き。2018年はそれよりも早いRipgrepを採用しています。
Ubuntuでのインストールは、下記の通り。
# ripgrep
curl -LO https://github.com/BurntSushi/ripgrep/releases/download/0.8.1/ripgrep_0.8.1_amd64.deb
sudo dpkg -i ripgrep_0.8.1_amd64.deb && rm ripgrep_0.8.1_amd64.deb
使い方はシンプルでrg 検索ワード。
shohey1226@pro79.local:/Users/shohey1226/dotfiles> rg vim
init.vim
1:set runtimepath^=~/.vim runtimepath+=~/.vim/after
3:source ~/.vimrc

starttmux.sh
10:  # create a new tmux session, starting vim from a saved session in the new window
13:  # Select pane 1, set dir to api, run vim
23:  tmux send-keys -t $session:1 "cd ~/git/Gauss; vim -S $HOME/.vim/sessions/gauss.vim" C-m
44:# return to main vim window

README.markdown
19:    $ git submodule init .vim/vundle.git/
20:    $ git submodule update .vim/vundle.git/
[Rails] Action Cableの実装方法
JQueryは古いテクノロジーとはいえ、さくっと動くものを作るときは異常に簡単です。 古いテクノロジーは悪ではなく適材適所で使っていくのが大事だと思っています。
まずは、最初からあるapp/assets/javascripts/cable.jsを該当layoutで読み込みます。
# app/assets/javascripts/application.js
...
//= require cable.js
全部のViewでApp.cableを呼ぶ必要はないのでcontent_forでActionCableとの通信をとるViewだけJSを走らせるようにします。
#app/views/layouts/application.html.erb
<head>
 ...
 <%= yield :page_scripts %>
</head>
JSでは、App.cableにイベントを登録していきます。 引数のchannelにはクラス名、引数を渡すとparamsに入ってサーバ側で処理できます。this.performを使ってクラス内のメソッドを呼ぶことができます。development環境では別プロセスで動作確認ができないのでsetTimeoutを用いてテストしています。
<% content_for :page_scripts do %>
<script>
  $(function(){
    // Subscrubung host status
    $('span.host-status')
    .filter(function(i){
      return $(this).text() !== "terminated";
    })
    .each(function(i){
      var hostId = $(this).data('hostId');
      var self = this;
      App.cable.subscriptions.create({channel: "HostStatusChannel", host_id: hostId}, {
        connected: function(){
          console.log('connected');
          //var self = this;
          //setTimeout(function(){
          //  console.log('say now');
          //  self.perform("say");
          //}, 1000);
        },
        received: function (data) {
          var currentStatus = $(self).text();
          if(data.status !== currentStatus){
            $(self).fadeOut(500, function(){
              $(self).text(data.status);
              $(self).fadeIn();
            });
          }
        },
      });
    });
  });
</script>
<% end %>
HTML部分は下記のような感じ。
<span class="host-status" data-host-id="<%= host.id %>"><%= host.status %></span>
で最後になりますが、ActionCableを継承したクラスです。subscribedがconnectionとともに走ります。 stream_for MODELでモデルに関係したチャネルが接続されます。 そして、broadcast_to(MODEL, object)でそのモデルへの接続を確率したチャネルにプッシュすることができます。
# app/channels/host_status_channel.rb
class HostStatusChannel < ApplicationCable::Channel
  def subscribed
    host = Host.find(params[:host_id])
    stream_for host
  end
   def say # for testing
    HostStatusChannel.broadcast_to(Host.find(1), "hi")
  end
 end
これでダイナミックにDOMを操作できるようになりました。
[Rails] Device利用時のconnection.rb(Action Cable)
Railsガイドで説明されているconnection.rbはcookieを利用しているもので、deviseを利用する場合は、request.envに設定されているwardenのものを取ってくる必要がある。 もしくはsessionの中を漁る感じ、request.envの方が綺麗に書けるのでこちらを採用した。 (Essentially, the both are cookie tho..)
module ApplicationCable
  class Connection < ActionCable::Connection::Base
    identified_by :current_user

    def connect
      self.current_user = find_verified_user
    end

    private
      def find_verified_user
        if verified_user = request.env['warden'].user
          verified_user
        else
          reject_unauthorized_connection
        end
      end
  end
end
参考: https://stackoverflow.com/questions/38470463/rails-devise-action-cable